
We hope you enjoyed the blog on Git Commands for Beginners. In part 2 of this series let’s try understanding the basics of GitHub.
Here, we’ll cover key fundamentals:
Creating an account in GitHub
Creating repository (repo) & pushing code to the repo
Creating branches and making merge requests.
Creating an account in GitHub:
GitHub is a super user friendly platform and creating an account using your “mail ID” should be a breeze.
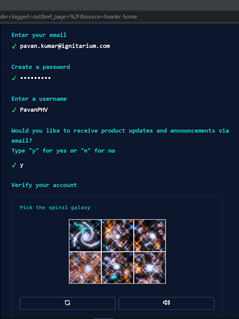
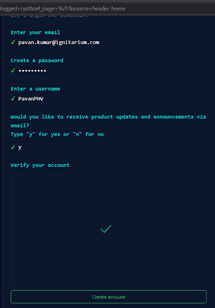
The above picture shows the ‘create an account’ screen on GitHub. After entering your details, you will click on “create account” now.
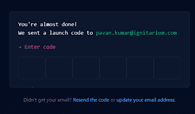
As the final step, GitHub will send a launch code (verification code) to your registered email ID. Enter that on the below screen and you’re all set.
When you first register yourself for GitHub, you will see the below Welcome screen-
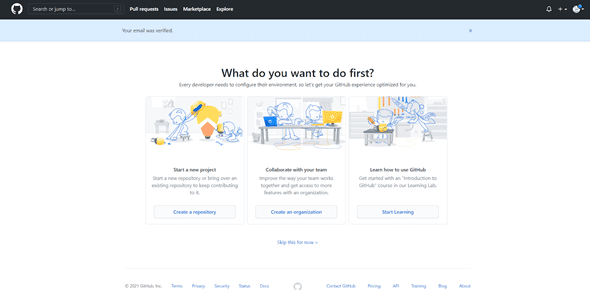
If you’d like to start working immediately on your repository, you can click on the “create a repository” button (or) you can use “Skip this for now.”
Creating a repository (repo) & pushing code to the repo:
So, when it’s the time to create a new repository, please follow these steps:
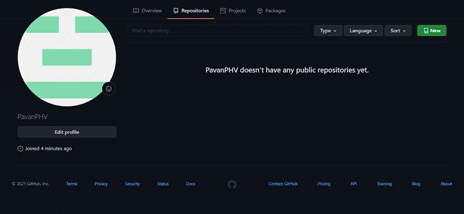
On the top right corner of your page, click on the account icon (). A dropdown opens up as shown below, select “Your repositories”.

You will be directed to a page like this ? and here you will click on the button,
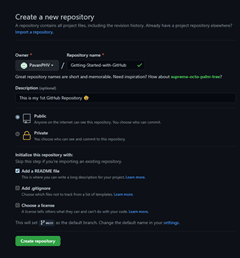
You will be directed to a page which looks as below, where you will give a name to the repository. We have named ours “Getting-Started-with-GitHub” . Pick a suitable unique name before clicking the “Create repository” button. Now type a “Description” for your repository and if you check in “Add a README file” then it gives the user a basic idea of why this repository exists.
After this, you will be directed to the new repository that you just created.
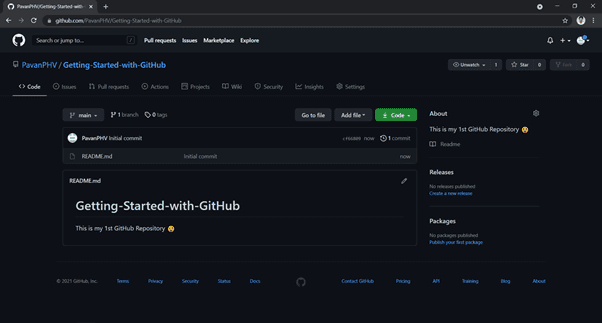
Congrats! You just created a new GitHub repository ?.
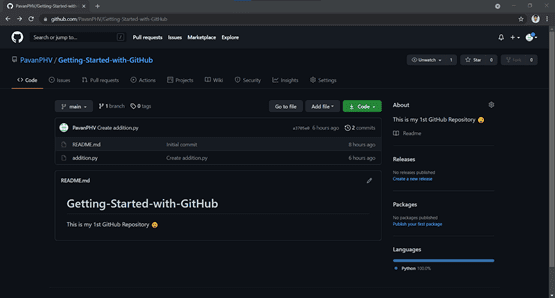
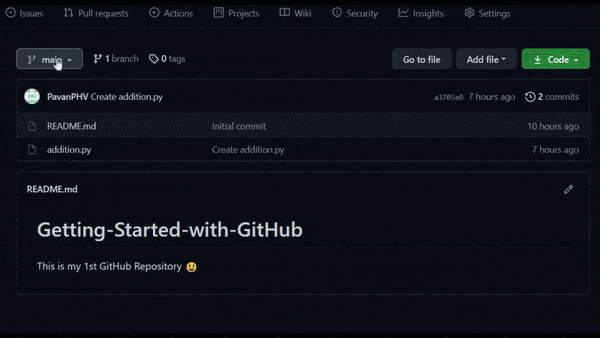
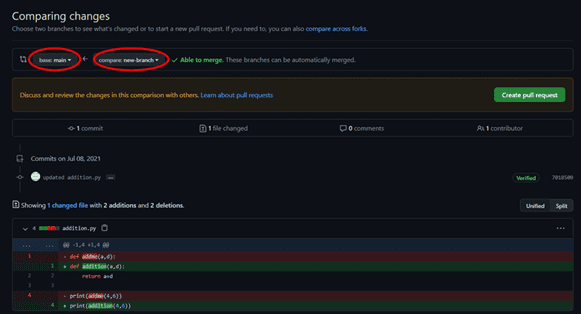
Now, let’s explore cloning the data from the git repository (remote repository) to your local repository, add some changes to that repository and push it back to the Github repository. If you have read our first blog on Git commands for Beginners then you will know how to add a file in the remote repository. Here, we have pushed an “addition.py” python file into our github repo as you can see below. Now we’ll edit the “addition.py” file by creating a new branch and merge it back.
Creating branches and making merge requests:
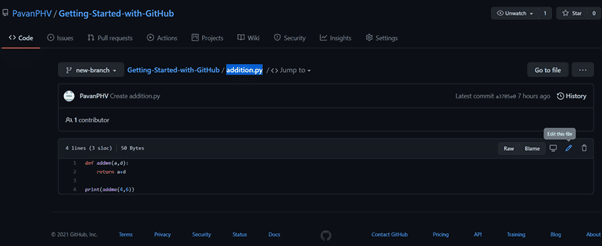
Just click on button, now in the search bar add the name of our new branch and click on create new branch. That’s it!
Now, in order to merge the new branch with the main, let’s make some changes in the “addition.py” file.
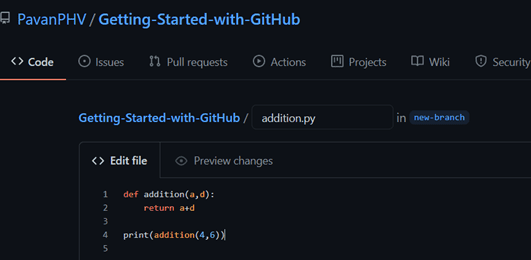
So, after opening the “addition.py” file we will make a few changes here.
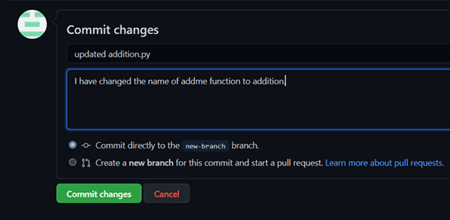
We just edited the “addition.py” file. After editing, describe your changes in the box. Here, we are informing our team that we have changed the name of add me function to addition. Then, click on
.
Next, go to the button and click on
, you’ll be directed to the below screen. Make sure that the order of pull is correct. Then, after confirming that our changes are right, click the
button,
You will be directed to this screen as mentioned below, click on the button.

We see a message displayed (as shown below) and you can even delete the branch if you’d like. Now, when you check the main branch you can see the updated file.

Conclusion:
At the end of this blog, you should have an idea of the fundamentals of GitHub, including creating & pushing code to a repo; creating a new branch; modifying existing files in the newly created branch; and merging them back to the main branch. Hope you enjoyed this second blog on Getting Started with GitHub. Let’s catch up in the next part on ‘GitLab for beginners’.


41 thoughts on “GitHub for beginners”
alprazolam mylan sans ordonnance: pansement dentaire pharmacie sans ordonnance – pharmacie infection urinaire sans ordonnance
online pharmacy netherlands: holland apotheke – pseudoephedrine kopen in nederland
stora bindor [url=https://snabbapoteket.shop/#]billig bh[/url] nät apotek
a-vitamin syre krem apotek: apoktek – magnesium apotek
https://zorgpakket.shop/# pharma online
https://snabbapoteket.com/# snacks när man är sjuk
apteka internetowa nl: MedicijnPunt – farma online
apotek smink [url=https://snabbapoteket.com/#]SnabbApoteket[/url] recept läkemedel
boka pcr test apotek: Snabb Apoteket – ГҐldersgrГ¤ns apotek
http://tryggmed.com/# apotek jobb
medicatie bestellen: mijn medicijn.nl – aptoheek
apotekvarer hjem: TryggMed – ginseng apotek
strep test apotek [url=http://tryggmed.com/#]maltekstrakt apotek[/url] kviseplaster apotek
https://tryggmed.shop/# a vitamin krem apotek
https://tryggmed.com/# dansk apotek
glidemiddel apotek: Trygg Med – boraks apotek
rosemary oil apotek: apotek engelska – handla billigt online
flГҐtt vaksine apotek [url=https://tryggmed.com/#]TryggMed[/url] nakkevarmer apotek
https://tryggmed.com/# flex apotek
svinkoppor Г¤rr: Snabb Apoteket – svinkoppor i hГҐrbotten
medicatielijst apotheek: MedicijnPunt – online medicijnen bestellen met recept
de online apotheek [url=https://zorgpakket.com/#]Medicijn Punt[/url] de apotheek
https://snabbapoteket.com/# syfilis test apotek
http://zorgpakket.com/# mijn medicijnen bestellen
rensesjampo apotek: Trygg Med – abortpille apotek
salttabletter apotek: Trygg Med – bittskinne apotek
https://zorgpakket.shop/# medicijn bestellen apotheek
apteka internetowa holandia [url=https://zorgpakket.com/#]de apotheek[/url] apotheke online
apotek barn: apotek ombud – rГ¶dcederolja apotek
med apotheek: Medicijn Punt – medicijn recept
http://zorgpakket.com/# apotheken
MediMexicoRx [url=https://medimexicorx.com/#]best online pharmacies in mexico[/url] mexican rx online
http://medimexicorx.com/# MediMexicoRx
https://indiamedshub.com/# indianpharmacy com
pharmacy website india: IndiaMedsHub – best india pharmacy
online pharmacy vardenafil: rx us meds pharmacy – ExpressCareRx
best india pharmacy [url=https://indiamedshub.shop/#]top 10 pharmacies in india[/url] mail order pharmacy india
https://expresscarerx.online/# ExpressCareRx
legal online pharmacies in the us: ibuprofen pharmacy singapore – ExpressCareRx
best online pharmacy india [url=https://indiamedshub.com/#]pharmacy website india[/url] india online pharmacy
https://indiamedshub.com/# pharmacy website india